Wednesday, August 6, 2008

New Baking Gloves

Hello again,
I just wanted to show you my new baking gloves. Our old ones got a little singed, I think from the BBQ, so I went to Russell Food Equipment (my favourite place to shop) to find a new set. I bought my sister a pair of these for Christmas (yes, we are all kind of nutty about food around here) and have wanted a pair for myself since. I am kind of proud of myself for not purposely destroying my old ones just to get new ones. Anyway, here they are...


They are professional baker's gloves with a reinforced Kevlar thumb. I really like that they are longer than the ones you usually see in most stores so that the hair on your wrist doesn't get singed off.

Happy Baking!
Stephan

Best Scrambled Eggs


Hi!
I wanted to share with everyone what is likely my favorite recipe to make. I made these scrambled eggs for my wife on the day I proposed and have made them more times than I can count. They always impress and don't even require you to make them especially bad for you.

I know many people will look at the eggs and go, "ewww, they look runny." This is the same thing my wife said the first time she saw them and she gags if fried eggs are served to her with runny white. She now requests that I make this every weekend. This is a nice simple recipe that one person can make if they get if coordinated well, but it is even more fun when two people make it together, especially when it is early Saturday morning and your coordinating skills haven't warmed up.

The recipe comes from my personal idol, Gordon "chuffin" Ramsay. I recommend serving it with some tomatoes on the vine and some cremini (aka baby portabella or brown) mushrooms. At the time I couldn't find any of the mushrooms I wanted because they have been difficult to find since on the major growers here had a fire. My wife also isn't a fan of the lightly cooked whole tomatoes (I think they are delicious) and I didn't have small enough tomatoes so I didn't make them this time. You can use regular cherry tomatoes if you like as well, but the presentation of tomatoes on the vine is wonderful.

If you have crème fraîche feel free to use it instead of the whipping cream, it will impart a lovely flavour to the eggs. I recommend using a non-stick pot to make these in unless you want to be scrubbing the pot for a long time. Eggs are the one place I always recommend using non-stick unless you plan to basically poach the egg in fat. I offer the choice of either butter or olive oil (you can do half of each too) and I can attest that the olive oil eggs are very good. Be sure to use the best olive oil you have and one that isn't too overly spicy so that it doesn't mask the flavour of the chives. The butter gives the eggs a more creamy texture that is wonderful on the palette and so it is preferred, but it also makes the recipe a bit rich. I have made these eggs with skim milk as well but with each removal of more and more fats it becomes less complex and the flavour suffers. Feel free to play with the recipe yourself, the technique is the really important part of the recipe, not necessarily the exact ingredients.

One final reminder; do not add the salt until called for in the recipe. If you add salt to eggs before they are nearly cooked you will end up with watery eggs.


Scrambled Eggs
Makes 2 servings

5 eggs
1.5 tbsp cold unsalted butter or olive oil
Splash (about 2 tbsp) of whipping cream or
crème fraîche
Chives (about 2 tbsp)
Salt and pepper

Crusty loaf
Tomatoes on the vine (the small ones work best)
Cremini mushrooms

1. Break the eggs into a small non-stick pot and add the fat.
2. Heat the eggs and fat over medium heat. Start to warm the pan for the mushrooms and tomatoes if you are making them.
3. Continue to stir the eggs with a heat-proof spatula. As the eggs cook, take them off the heat as you notice the eggs starting to cook faster. One the egg cooking has slowed, return them to the heat. You end up putting the eggs over the heat for approximately 30 seconds and then off the heat for approximately 30 seconds.
4. Toast two thick slices of the bread and drizzle with olive oil.
5. As you notice the eggs getting close to the final picture, add the cream, chives, and salt and pepper to taste. Take the eggs off the heat and let the eggs continue to cook off the heat. The cream should slow the cooking and keep the eggs from overcooking. The eggs almost have the consistency of risotto.

Resist the temptation to overcook the eggs. It may take a couple tries of this recipe to get it just right, but after that they will be no problem.

Mushrooms and Tomatoes:
Heat frying pan over medium heat and place mushroom and tomatoes (on the vine) into the pan. Drizzle with olive oil and sprinkle with salt and pepper. Turn the mushrooms half-way through the cooking.


Make these for someone this weekend and let me know how it went!
Stephan

Monday, July 28, 2008

A Quick Update

Hi Everyone,
Just wanted to post an update to mention that I will be putting up another post later today and definitely one tomorrow. I baked a very delicious Saskatoon Berry Pie earlier this week and I also made some buttermilk doughnuts (with mixed results). I learned some important points about making doughnuts and will be sharing them with you.
I have been very busy the last few days and a bit exhausted from the mad pace of my work so I was unable to put up some new posts.

Oh, and one important thing to note!
I will be moving the blog over the weekend to the new website. The blog will officially be at www.thisengineercanbake.com.

Hoping to talk to you again soon,
Stephan

Thursday, July 24, 2008

Sour Cherry Almond Oatmeal Scones


It's finally time for the last (and in my opinion best) recipe from the one I made last weekend. These scones were so good they disappeared before the weekend even ended, which is pretty good when you have a pile of biscuits and other scones.

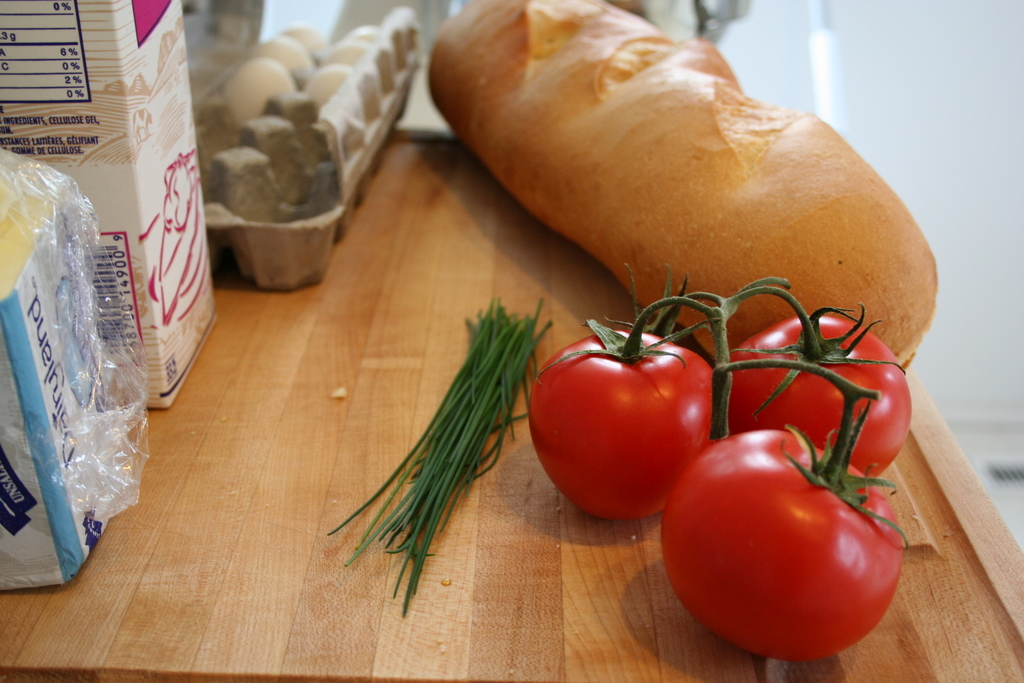
I picked up these dried Montmorency sour cherries from Costco quite a while ago and have been slowly nibbling on them, but had yet to find somewhere to use them. I figured that a scone would be a great place to use some, but I wasn't quite sure what to pair the cherries with. After a bit of searching through recipe books and other food blogs I noticed that almonds were a common pairing and decided to add some sliced almonds to my recipe. Not being satisfied with just that I searched a little more and thought that a bit of cinnamon would also help create a nice balance. With my idea and base recipe in hand I plunged ahead.

As you can see below, this recipe used the food processor again and as in the last scone recipe you can use a pastry blender, knives, or your hands to prepare the dough, but I recommend the food processor method if you have one.

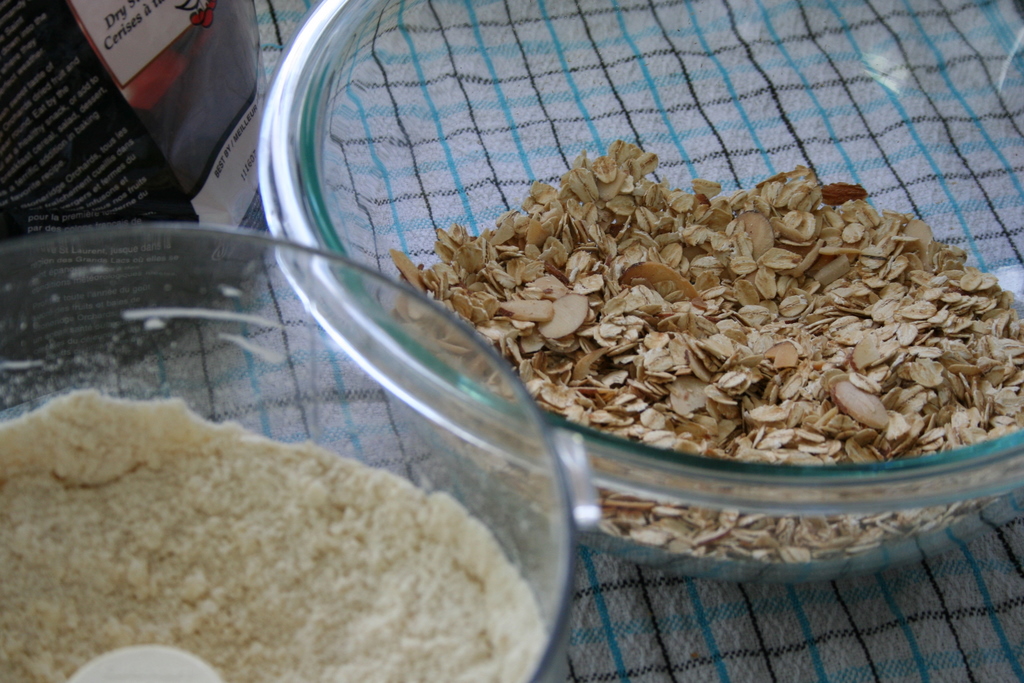
The most notable difference in these scones from the last ones is the addition of oatmeal which helps to lock in a bit of moisture, add a little extra bite, and also have a really nice flavour when toasted and baked.


Scones always come together quickly and that is one reason I love them. It is also very important that this occurs because if you work them too much they turn into the generic grocery store variety that are dry and tough.


And here is the finished product coming out of the oven. These scones tended to have a really nice crust which made them all the better.


Because these scones are a bit tart they don't work well with tart jams like raspberry. I liked them best plain or with a little honey on them. I hope you will try making some and see how good they are for yourself.


Sour Cherry Almond Oatmeal Scones
Based on a recipe from Baking Illustrated

1 1/4 cups (3 3/4 oz) old-fashioned rolled oats or quick oats
1/4 cup sliced almonds or chopped skinless almonds

1/4 cup whole milk (add a little cream to your milk if you don't have whole milk)
1/4 cup whipping cream
1 large egg

1 1/2 cups (7 1/2 oz) unbleached all-purpose flour
1/3 cup (2 1/3 oz) sugar, plus 1 tbsp for sprinkling
2 tsp baking powder
1/4 tsp cinnamon
1/2 tsp salt

10 tbsp (5 oz) cold unsalted butter, cut into 1/4 inch cubes

1/2 cup dried sour cherries, chopped

1. Adjust oven rack to middle position and heat oven to 375 degrees. Spread the oats and almonds on a baking sheet and toast them for 7 to 9 minutes once the oven has warmed, until they are lightly brown and fragrant. Cool baking sheet on a wire rack.

Increase the oven temperature to 450 degrees and a baking sheet with parchment paper.

When the oats have cooled, set aside 2 tbsp.

2. Whisk the milk, cream, and egg in a large measuring cup until incorporated; set aside 1 tbsp for glazing.

3. Place the flour, sugar, baking powder, cinnamon, and salt in the work bowl of a food processor fitted with the metal blade and process until combined, about four 1-second pulses. Scatted the cold butter over the dry ingredients and process until the mixture resembles course cornmeal, twelve to fourteen 1-second pulses. Transfer the mixture to a medium bowl and stir in the oats, almonds, and cherries. Fold the liquid ingredients into the dry with a rubber spatula until large clumps form. Use your hands or press the dough with the spatula in the bowl until the dough becomes a cohesive mass.

4. Dust the work surface well with reserved oats, turn the dough out onto the work surface, and dust the top with the remaining oats. Pat the dough into a 7-inch circle approximately 1 inch thick. Cut the circle into 8 wedges with a dough scraper or chef's knife and set onto parchment lined baking sheet. Brush the scones with the milk mixture and sprinkle them with the remaining 1 tbsp of sugar. Bake until golden brown 13 to 14 minutes; cool on the baking sheet on a wire rack 5 minutes; then remove scones to a wire rack and cool to room temperature, about 30 minutes (although I doubt I waited this long). Serve.

Stephan

Tuesday, July 22, 2008

Blackberry-Lemon Scones


After having success with the biscuits I made I started to get more inspired and decided to bake another recipe. This time I was making scones. Not just any scones though, I decided on making Blackberry-Lemon Scones. This recipe is a variation off of the one I found in my Baking Illustrated cookbook.

I have to say that these scones were absolutely delicious with a bit of raspberry jam. I am the type that likes to put jam on my scones so these were perfect, although they are also nice without anything at all I must say. These lie firmly between the two types of scones out there, English-style which as less sweet so that they can have jams spread on them and American-style which are sweeter and more meant to be eaten plain.

I happened to have some blackberries in the fridge from our local produce store. As a bit of an off note, I have to praise out produce store. They only stock the fruit the major chains won't buy and so they get great prices and a lot of the fruit is quite ripe when it arrives and so it tastes much better. It is also literally about 100 feet from our house if you want to hop a fence and so it is incredibly convenient to swing by there and check out what looks good. I wish there were more stores like it.

Here are my lovely blackberries, as you can see you don't really need many to make the recipe.


The dough came together nicely in the food processor and because you use it to add the blackberries to the dry ingredients the berries don't bleed too badly into the dough. This recipe is a fair bit harder if you do not have a food processor, but I can attest from experience that it can be done with a pastry blender (I recommend you pick up the more solid type with blades as opposed to the wiry kind that don't cut as well), or two knives. I don't recommend using your hands because of the berries.


Scones are one of my favorites because they are so quick, simple, and delicious. They also tend to impress because of the terrible scones we get here in North America. I think we all have had one of those bland, floury, dry scones.


And here is the finished product. Remember to let the scones cool a little (10 minutes) before eating them so that they have a chance to firm up. I am planning to submit this picture to the food blogging sites in an attempt to get some notice for my blog, so here is hoping.


And this is the plate only moments later.


Before I post the recipe I just wanted to add one last note in here and simply it is that I love to give advice on cooking and baking. I may not be a traditionally trained chef or baker, but I have taken many courses from some excellent teachers and I greedily read a lot of material related to cooking and baking to expand my understanding of how it all comes together. I also will admit if I don't know the answer to something and if you can stump me, all the better, because it will mean I will scour every book and website I can find to discover the answer for both of us.

Blackberry-Lemon Scones

2 cups (10 oz) unbleached all-purpose flour
1 tbsp baking powder
3 tbsp sugar
1/2 tsp salt

5 tbsp (2.5 oz) cold unsalted butter, cut into 1/4 inch cubes
1 tsp lemon zest

1/2 cup blackberries

1 cup whipping cream, plus 1 tbsp for brushing the scones

1. Adjust the oven rack to the middle position and heat the oven to 425 degrees.

2. Place the flour, baking powder, sugar, and salt in the work-bowl of a food processor fitted with the metal blade. Process for six 1-second pulses until mixed.

3. Distribute the butter over the dry ingredients and pulse for twelve 1-second pulses. You can also use your hands, two knives, or a pastry blender to cut the butter into the dry ingredients. The finished product should look look like course cornmeal. Add the blackberries and pulse for three 1-second pulses or until the blackberry pieces are the size of large blueberries.

4. Stir in the cream and mix with a spatula for 20-30 seconds and the dough begins to form.

5. Transfer the dough and any remaining dry bits to a counter top and knead for 5 to 10 seconds, until the dough comes together. The dough should be a little sticky still. Press the dough into an 8 inch round (you can do this in a cake pan and then turn it out if you like) and cut into 8 wedge with a sharp knive or dough scraper. Place wedges onto a parchment lined baking sheet and brush with remaining 1 tbsp cream and sprinkle with sugar. I tried regular sugar and raw sugar on four each and much preferred the large crystals of the raw sugar.

6. Bake until the tops of the scones are lightly browned, 13-15 minutes. Cool on a wire rack for at least 10 minutes. Serve warm or at room temperature.

Saturday, July 19, 2008

It's time for some biscuits and scones!


I love biscuits and scones. So this weekend as I was working through my Baking Illustrated cookbook I was very happy when I reached a bunch of recipes for them that I had yet to try (the last one I have made before, but I wanted to make it again with a variation).

This weekend I made some cream biscuits, blackberry scones, and some sour cherry almond oatmeal scones.

I have made a number of recipes from the Cook's Illustrated folks and I have to recommend their recipes to everyone. They tend to be very clear and well tested and that always makes baking a lot easier. The only problem I ever have with them is that some of their recipes can turn slightly "vanilla" because they are over tested and they try to make them agreeable to people whom may not have the best palate or just don't know how much better the recipe can be. I found this with their Eggplant Parmesan and could not believe how terrible it was compared to the version I got from the old Italian lady whom taught me Italian Cuisine.

So, on to the cream biscuits....

I love buttermilk biscuits and these are described as the easy version, although I find buttermilk biscuits very easy if you have a food processor. I do have to agree with their opinion of them being easy because they truly are. It took just a couple of minutes for the dough to be complete.


They baked up nicely and tended to take a little longer than the recipe suggested. Here is the finished product...


Their taste was ok, but without the buttermilk they were less moist and tender and lacked the nice tang that buttermilk imparts. These biscuits have a lot of utility though since they can be used as a breakfast treat with some jam or corn syrup, or they can be used as a nice biscuit to go with soup or stew.

Cream Biscuits

2 cups (10 oz) unbleached all-purpose flour
2 tsp sugar
2 tsp baking powder
1/2 tsp salt

1 1/2 cups whipping cream

1. Adjust the oven rack the upper-middle position and heat to 425 degrees. Line a baking sheet with parchment paper.

2. Whisk together the flour, sugar, baking powder, and salt in a medium bowl. Add 1 1/4 cups cream and stir with a wooden spoon until the dough comes together (about 20-30 seconds). Transfer the dough to the countertop, leaving the dry bits in the bottom of the bowl. Add 1 tbsp at a time (up to 4 tbsp) to the dry bits in the bowl until they are moistened after mixing. Add the moistened bits to the dough and knead the dough until smooth, about 30 seconds.

3. Press the dough into an 8 inch round (you can put it in a cake pan to make it easy) and cut with a sharp knife or dough scraper into 8 wedges. Place biscuits onto the parchment-lined baking sheet and bake until golden brown, 15-17 minutes. They are best served warm.

Bye!

PS: If you have any advice on blogging, please feel free to send it my way.

Wednesday, July 16, 2008

Time to change the blog

I am sure no one has noticed, but I changed the blog's name and address to reflect my new direction. The blog will now be more directed toward my baking exploits.

Tuesday, July 15, 2008

Long pause is over

Well, after two weeks away from work (and too little cooking in my opinion) I am back to posting. I will be putting up photos of my curry which turned out ok, but because my wife decided she would like some (she usually doesn't want any of the curry) I had to omit the hot stuff since she is allergic to hot peppers. I also decided to try a fish version since I have never done it with fish and I thought it might be a good use for the mediocre fish we get here. Sadly, the fish still tasted...fishy. The curry was definitely better the next day, but it still didn't have the same flavour as the ones I have made in the past.

I forewarn now that the pictures are not great, because my wife's camera was dead and so I did all photos on my phone and obviously that isn't about to produce a great picture.

On a very happy note though I did manage to convince my wife to allow me to buy the camera I have been yearning for for about 3 years now. I bought myself a Canon Digital Rebel XT, which I have absolutely fallen in love with and have shot about 500 pictures with so far. I have some very cute pictures of our puppies that I will be unable to resist posting later on tonight when I download all the pictures off the memory card.

So, here is hoping my evening doesn't get sidetracked with household duties and I am able to work on my blog more.

Oh, I almost forgot to mention that I made some more stuff during my time off and will be posting those pictures and recipes as well.

Bye!

PS: I have decided to commit much more of my time away from cooking and toward baking as I have recently decided I would like to become a baker in some respect (working for myself obviously) and so I will be doing much more of that.

Tuesday, June 24, 2008

Curry Day!

Ok, so I am going to make my very best attempt to make my long awaited curry tonight. I have been planning to make it for some time but I keep running out of time each evening. With 2 dogs, 1 cat and 1 rabbit to take care of as well as having a new house I have precious little time to do some recreational cooking. Let's hope that tonight I will find the time to make my curry and take some pictures along the way.

Regards,
Stephan

Monday, June 23, 2008

My First Post

Well I am certain not many people will read this first post (for now at least), but I decided to try out blogging a little. I cook and bake a lot and am quite good at it and I am also an engineer. I happen to be the nerdiest kind, a computer engineer. I read a number of other peoples' blogs and figured I could do that and at the same time make my other engineers looks slightly less inept in the kitchen. So, with some luck and work I will attempt to turn this blog into a regular part of my life and post the recipes I make and maybe some nice pictures for you to read and inspire you to get into the kitchen on these hot summer days.

Please remember I am an engineer and my hands like to type different words than are in my head and so you might notice the occasional blip in the grammar and wording. Luckily I am a fan of good grammar and spelling and such and so I don't mind if you pick my wording apart or find my goofy mistakes.

Regards,
Stephan